Setting Up & Pairing
For your convenience, each single Alertolarm system (not twin packs) already has the PIR sensor, Audible receiver and Remote control fobs pre-linked to one another. Therefore all that is needed is to choose, the Audible receiver alert tone/voice notes, volume or vibrating options. This said if you wish to add additional PIR sensors, Audible receivers or remote control units all can be managed as below also:-
Volume & Ring Tones
Volume
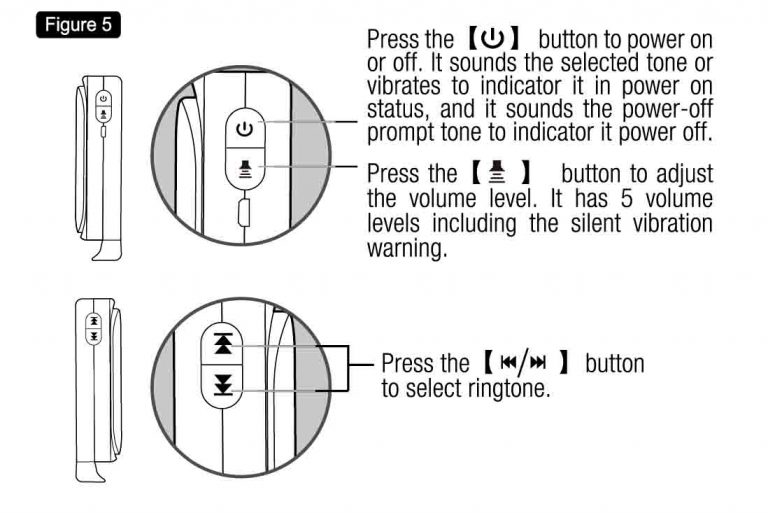
As per the images above we have aimed to make use of AlertOlarm to be as easy as possible. To control the volume output of the Audible receiver unit simply press the bottom ‘horn button’ to the right hand side (face fronting) of the unit. There are 4 x Volume options and 1 x no noise/vibration option. The unit is preset to max volume, to reduce volume simply press the ‘horn button’ once for volume level 3, once more for volume level 2 etc. To use the vibrate only option press the ‘horn button’ 5 x times, to return to max volume press the ‘Horn Button’ one more time (and repeat previous for various volumes etc)
Ring Tones
AlertOlarm has been designed for either alerting the owner of an entry attempt directly or dissuading the thief from entering in the 1st place by using the Audible receiver siren etc (or both if using more than one system). As such the user can choose from a variety of 8 x Siren/Voice alert sounds. The alert sounds vary in length from a few seconds up to 30 seconds. You can choose the alert to suit your circumstances by simply using the up/down arrow buttons to the left hand side (front facing). To scroll through all 8 x sound alerts, first press the down arrow buttons 8 x times in sequence. Press the up arrow to reverse the sequence. Simply stop at the alert sound you wish to use and that sound will be set. Please note that if the volume has been selected to the ‘no noise/vibrate only’ option then you will also be able to choose between 2 x vibration options, up arrow for option 1, down arrow for option 2. You can only choose your alert sound options if your volume selection is for audible volumes 1-4.
Pairing

Although your single system purchase should already all be pre-linked together AlertOlarm has been designed so that additional pretection can be added by pairing additional PIR sensors/Audible receivers and remote to a single system. You can add up to 32No PIR sensors, 8x Audible receiver units, 8 x Remotes control fobs
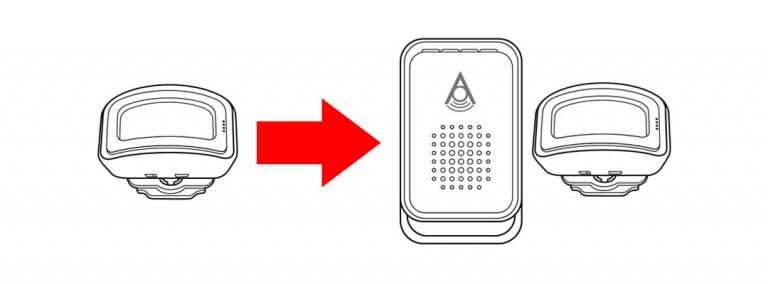
1. Pairing additional/multiple PIR sensors to one Audible receiver unit
First turn off the Audible receiver unit. Press the power buttons (top button to right hand side, front facing) and you should hear 4 x variable single tones. This denotes off. Also ensure the PIR sensor unit is turned on. Once Audible receiver unit is off, then press and hold the lower ‘horn button’ until you hear and single ‘Du’ tone and one blue coloured light to the top of the unit should illuminate. Choose the ring tone (see above) you wish the PIR alerts to be linked by using the up and down arrow keys to the left hand side (front facing), once choosen, then wave you hand in from of the PIR unit. The audible receiver unit should emit another single ‘Du’ sound and the blue light on the receive unit should flash once and then not illuminate. The new PIR sensor will now be linked Audible receiver unit. To test, turn the Audible receiver unit back on (you will know it is on as it will either sound the alert tone for 5 seconds or if it is in vibrate mode then it will vibrate accordingly), then wave your hand in front of the linked PIR sensor and it should sound the alert sound you have chosen.
If wanting to add multiple PIR sensors, then repeat the above process for each PIR sensor (If operating two fully separate systems within the same environment, then ensure the PIR sensors on the system you are not wanting to link to are all switch off. If only using the one system, with then other PIR sensors can be left on before commencing). Different alert noises can be chosen for each PIR sensor if required. Please note the lights to the top of Audible receiver unit change per PIR sensor added (in terms of flashing when an alert is raised). This is carried out automatically and in sequence, for example if only one PIR is linked then the lights will flash red when that PIR is activated. If 2nd PIR is paired then this one will light green on the Audible receiver unit when activated, helping you further identify which PIR zone has been activate when the Audible siren alert sounds. The audible receiver unit should emit another single ‘Du’ sound and the blue light on the receive unit should flash once and then not illuminate. The new PIR sensor will now be linked Audible receiver unit.

2.Pairing additional Audible receiver units to existing PIR sensors
First turn off the current Audible receiver unit (1) to which the PIR sensor/s is linked to. Then also ensure the new Audible receiver unit (2) is also turned off. Press the power buttons (top button to right hand side, front facing) and you should hear 4 x variable single tones. This denotes off. From there it is a case of then linking the existing PIR sensor/s to the new Audible receiver unit (2) as above section. For clarity see process again as below:-
Once Audible receiver unit (2) is off, then press and hold the lower ‘horn button’ (on that unit 2) until you hear and single ‘Du’ tone and one blue coloured light to the top of the unit should illuminate. Decide the PIR sensor (1) you wish the new Audible receiver (2) to be linked to. Then Choose the ring tone (top of page) you wish the PIR alerts to be linked by using the up and down arrow keys to the left hand side (front facing), once choosen, then wave you hand in from of the PIR unit. The audible receiver unit should emit another single ‘Du’ sound and the blue light on the receive unit should flash once and then not illuminate. The existing PIR sensor (1) will now be linked Audible receiver unit. To test, turn the Audible receiver unit back on (you will know it is on as it will either sound the alert tone for 5 seconds or if it is in vibrate mode then it will vibrate accordingly), then wave your hand in front of the existing PIR sensor (1) and it should sound the alert sound you have chosen. Also remember to check the initial Audible receiver unit (1) is still linked to the PIR sensor (1) by turning the Audible receiver (1) on (this can be done whilst Audible receiver unit (2) is still on) and wave your hand again in front of PIR sensor (1). Both Audible receiver units should now be linked to the one PIR sensor.
If the original Audible alarm sensor (1) had more than one sensor linked to it and you wish those sensors also to be linked to Audible alarm sensor (2), then simple repeat the latter process to link PIR sensor (2)(3)(4)(5) etc. To make life easy try to link in the initial sequence used for Audible receiver unit (1).
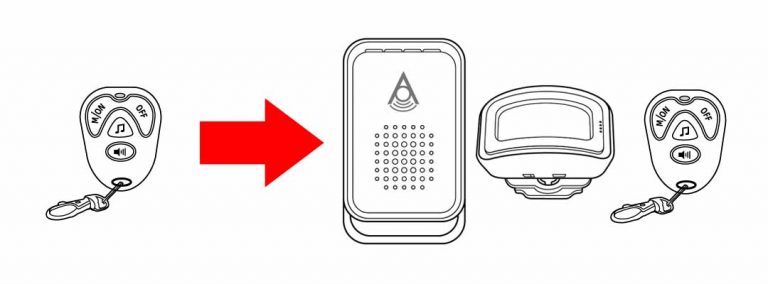
3.Pairing more than one Remote control fob unit to one or more Audible receiver unit.
Firstly and just as a reminder the Remote control can only turn on/off the Audible receiver unit and not the PIR sensors (these need to be turned off manually). Linking a new/replacement/additional remote control fob to another/existing Audible receiver unit needs the Audible receiver unit to first be placed in link mode.
First turn off the Audible receiver unit. Press the power buttons (top button to right hand side, front facing) and you should hear 4 x variable single tones. This denotes off. Also ensure the PIR sensor unit is turned on. Once Audible receiver unit is off, then press and hold the lower ‘horn button’ until you hear and single ‘Du’ tone and one blue coloured light to the top of the unit should illuminate. The press any of the key on the remote control fob you wish to link. The audible receiver unit should emit another single ‘Du’ sound and the blue light on the receive unit should flash once and then not illuminate. The new remote control fob will now be linked Audible receiver unit.
To test simply press the on button on the new remote control fob unit and it should turn on the linked Audible receiver unit accordingly.
is proudly powered by WordPress